
Deploying a Mendix application on a Linux server combines flexibility, performance, and fine-grained control, which is ideal for enterprises prioritizing security or custom scalability. With Debian’s hardened security framework and lightweight architecture, organizations avoid the pitfalls of opaque shared infrastructure, delayed vendor patches, or bloated dependencies, ensuring a lean, auditable environment tailored to your app’s needs. Whether moving beyond the Mendix Cloud or preparing a production ready deployment, understanding the steps involved in hosting a Mendix .mda (Model Deployment Archive) file on your infrastructure is essential.
In this blog, we’ll explore how the Mendix package is deployed to a Linux server, including prerequisites, setup, and step-by-step instructions using tools like WinSCP, PuTTY, M2EE tools, and a PostgreSQL database. Whether you’re deploying for the first time or looking to standardize your deployment process, this guide will help ensure your Mendix app runs smoothly on a Linux environment.
Prerequisites:
- A Linux Debian 10.0 (Buster version) server with root or sudo access
- A Mendix .mda file (exported from Mendix Studio Pro)
- Mendix runtime (compatible with the application version)
- PostgreSQL database
- M2EE admin tools (m2ee-tools)
- Java (OpenJDK 11 for Mendix 9; Java 21 is mandatory for Mendix 10 and above)
- WinSCP and PuTTY
Server:
Debian is a free and open-source operating system based on the Linux kernel (or sometimes other Unix-like kernels). It’s known for its stability, reliability, and strong community support, making it an excellent choice for use on servers in production environments, data centers, cloud infrastructure, and personal projects.
Key Features of a Debian Server:
- Flexibility: Can be used as a web server, mail server, database server, file server, etc.
- Stability: Ideal for production environments due to rigorous testing and long-term support.
- Security: Regular security updates and strong community oversight.
- Package Management: The powerful APT (Advanced Package Tool) system is used for installing and managing software.
Common Use Cases:
- Hosting websites (e.g., Apache, Nginx)
- Running applications (e.g., Java apps, Mendix)
- Database hosting (e.g., MySQL, PostgreSQL)
- Virtualization and containerization (e.g., Docker, KVM)
Install Required Dependencies:
1. Create a directory for Java
# sudo mkdir -p /usr/lib/jvm
# sudo tar -xvzf OpenJDK21U-jdk_x64_linux_hotspot_21.0.1_12.tar.gz -C /usr/lib/jvm
- Update alternatives
# sudo update-alternatives –install /usr/bin/java java /usr/lib/jvm/jdk-21/bin/java1
# sudo update-alternatives –install /usr/bin/javac javac /usr/lib/jvm/jdk-21/bin/javac 1
- Create a Mendix User
# sudo useradd –create-home –shell /bin/bash Mendix
# sudo passwd Mendix
Configure m2ee File:
Create the m2ee.yaml configuration file in ~/apps/myapp/ as shown below in the image

Adjust the database credentials and app name accordingly
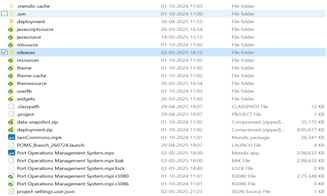
Then navigate to the Mendix application in Studio Pro, which needs to be deployed, and create the Mendix deployment package as shown below

After clicking “create deployment package,” choose the latest version for the deployment and click “create.” It will generate and download a .mda file in the app’s release folder, as shown in the image below.
Want expert support for your Mendix Linux deployment?
Get in Touch
Now the .mda file has been generated for the deployment.
Open the WinSCP tool to securely transfer the .mda files to the designated server location, utilizing protocols such as SFTP or FTP. To establish a secure session, connect by entering the server’s IP address (172.0.0.0), along with the appropriate username and password.

After connecting to the server in WinSCP, you’ll see your local folders on the left and the server’s directories on the right. To transfer the .mda file, drag it from the left pane to the appropriate location in the right pane, as shown in the image below.

Once the file has been transferred to the appropriate server path, open the PuTTY tool, select SSH as the connection type, set the port number “22”, and enter the server’s hostname or IP address to execute the required commands.

Establish a connection to the server by entering your login and password in putty. Once authenticated, proceed to execute the subsequent commands sequentially.

Commands to unpack and deploy the Mendix .mda file package and deploy
#su – root #password: ****#cd /tmp
#chown pomsdevuser:pomsdevuser * -R
#ls -ltr
#su – (servername)
#cd /tmp
#cp ‘ Myapp_1.0.0.1.mda ‘ /srv/mendix/servername /data/model-upload
#cd /srv/mendix/servername/data/model-upload
#cd
#m2ee
#stop (If the server is already running, this command will stop it. For a first-time deployment, this step can be skipped)
#unpack Myapp_1.0.0.1.mda (To unpack a .mda file on a Linux system, the exact command depends on the file’s format) After executing this command, you will be prompted to choose between “yes” or “no.” Type “y” to proceed as shown in the image below.

#start (If you start the server, it will prompt three options: abort, execute, view)

#execute (e)
#status (The final command indicates the server is running successfully)

Addon:
While implementing custom login in Mendix 10, we discovered that session creation through Java actions is no longer supported. We resolved this by leveraging the login JavaScript action included in the nanoflow commons module, which is designed to be triggered from a nanoflow for user authentication.

Conclusion:
Deploying a Mendix application on a Linux server empowers organizations with greater control, customization, and scalability. You can ensure a reliable and efficient deployment by following the outlined process, which includes setting up the environment, transferring the .mda file, configuring m2ee tools, and connecting to a PostgreSQL database. This approach supports production-ready hosting and builds a solid foundation for future automation and performance optimization in enterprise-grade environments.


